Radio Ramblings: Beginning the HF journey, part 1 (11 February 2024 CE)

I've been trying to decide how I'm going to approach this, because I have a lot to talk about, but I feel like it could get overwhelming if it all got brain-dumped in a single post. Basically, I have a huge, neurodivergent infodump I want to present, and I want to know at least somebody's going to stick around and read it!
Problem is, the longer I wait to at least get it started, the longer it will get, because the journey is ongoing; and the less likely I'll actually write anything at all, because it will feel overwhelming even to me! That's no good.
So, like Things Fall Apart, I'm going to do this in installments. This first installment is going to be akin to the article I wrote back when I built my gaming PC. I'm going to talk about what I bought, and why I thought it was a good idea at the time.
The Goal
Having achieved my General License, I set out to kit myself up to operate on all the bands I'm now permitted to operate. That means moving beyond my VHF/UHF handheld operation on local repeaters, and seeing if I can use HF frequencies to talk to the wider world.
That, in turn, means equipment. A lot of equipment. Possibly, in the end, more equipment than I really needed to buy all in one swell foop. On the other hand, it really did feel akin to when I built the gaming PC. I did a lot of reading, a lot of chatting with people, a lot of YouTubing...and then, having decided where I wanted to start, I just kinda pounced on all the pieces.
The key point, though, is "start". This is the beginning, I hope, of a long exploration. I'm going to make mistakes, bad choices, be bad at some things and better at others. I'm going, in short, to be a complete n00b, just a fairly well-read, well supported n00b.
The good news is, while there certainly are an unfortunate share of Cranky Old Men in the hobby (and the cranky ones are almost all both men, and old), there is also a huge amount of support to be had. YouTube abounds with helpful videos; I've found three different Discord communities—one local to Richfield; one general to Minnesota; and one global, associated with one of those YouTube channels—and received tremendous support from all of them.
In fact, the YouTube ecosystem for ham enthusiasts is so rich and so varied that I had to resist the temptation to just become a radio voyeur. There is a part of me that could be happy just living vicariously through all these varied videos. But that would defeat one of the points of getting into this hobby, which is to get out and do stuff! It would also defeat the point most of these YouTubers have in making their videos! They don't just want people to watch them, they want to encourage people to get involved!
The Gear
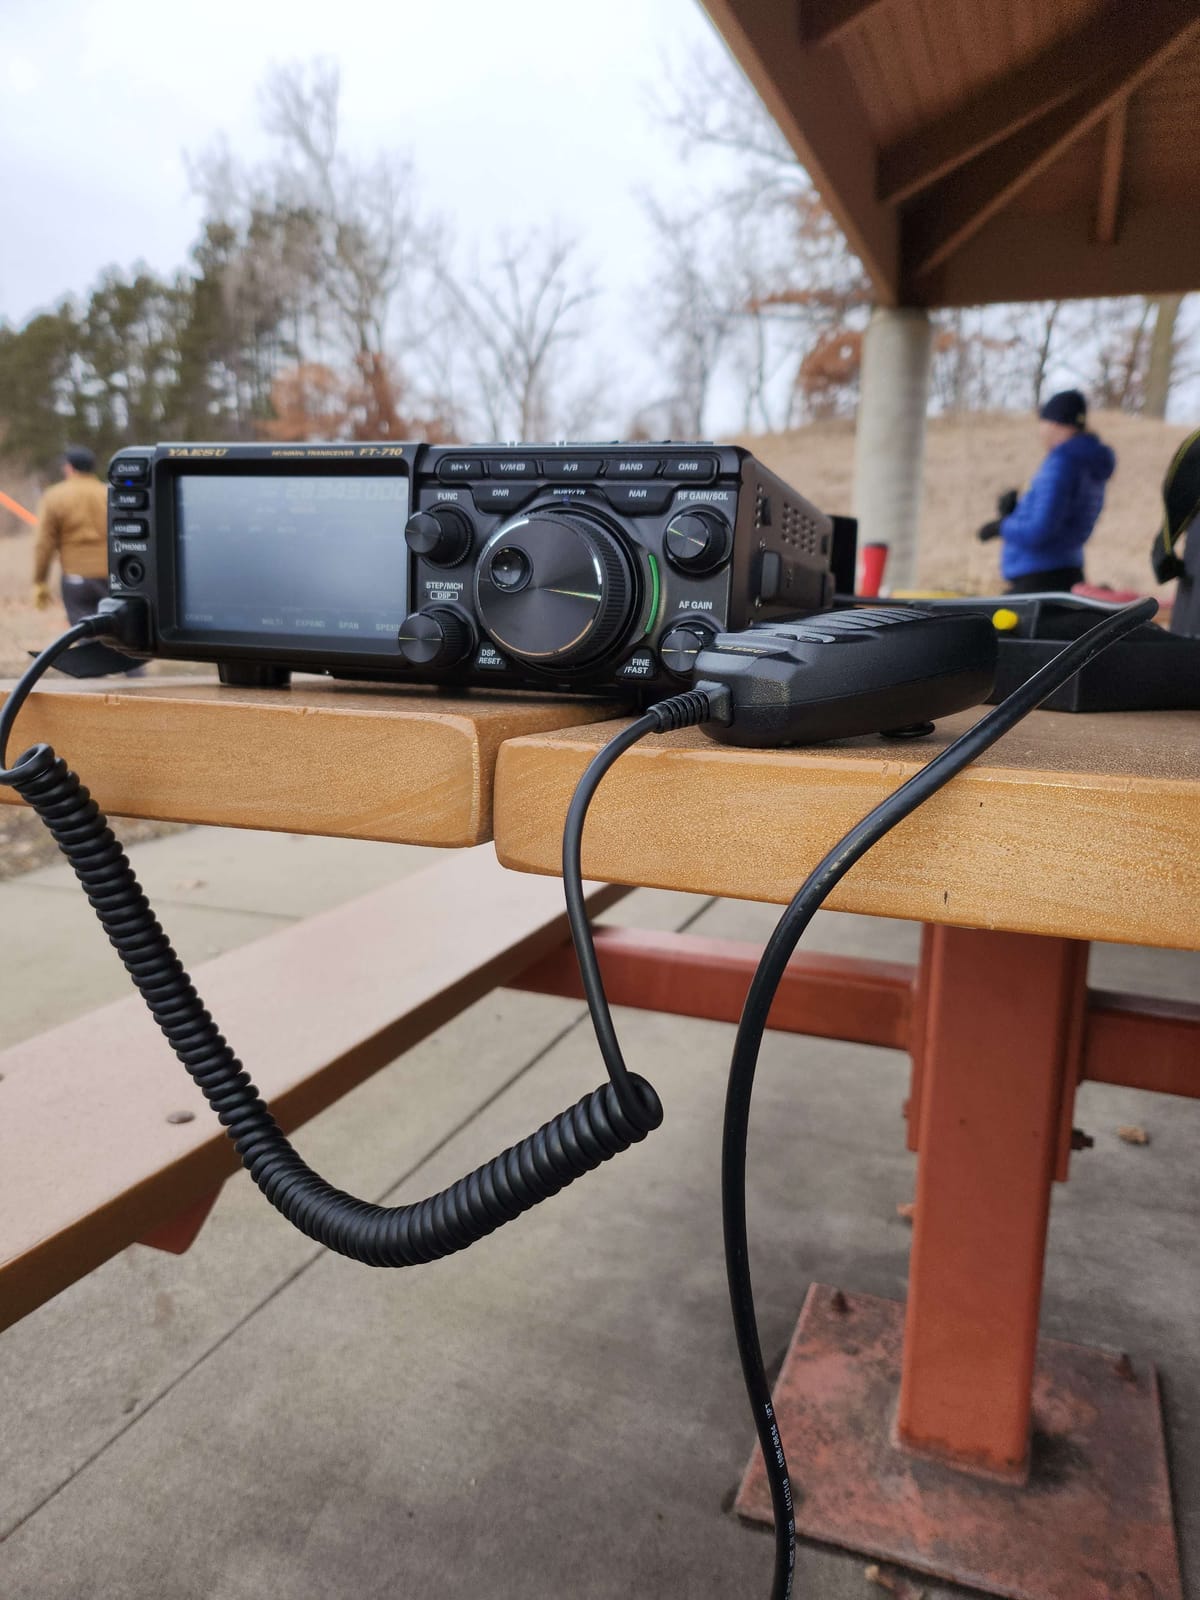
Radio: Yaesu FT-710 Field


This radio covers amateur radio frequencies from 160m (just above broadcast AM) through 6m (50-54MHz). It can receive everything in between the ham bands as well, but of course, you're not allowed to transmit. It can transmit at 100W on voice modes, which is a pretty typical "full power" operation. Depending on your license, you can use an amplifier and transmit at higher power, and some do.
A lot of hams, though, not only stick to 100W or so, but often deliberately go lower, either to conserve power when operating portably, or to challenge themselves to see how far their signal can get at low power.
The FT-710 is considered a good general-purpose radio. It's got enough capabilities to be a good base-station, but it's also relatively portable (about 9 lbs.) The color display is a touch-screen, replacing many of the buttons and knobs that used to be common on "base station" radios. Not everyone in the hobby is a fan of this approach, but since this is my first "real" radio, I don't have any direct experience to compare it to. So far, I'm OK with the approach, although I sometimes think it might be nice to have a particular feature on its own button or knob.
The radio also includes a USB-B interface. Connect to a computer, and it presents itself as two different peripherals: a remote control interface for the radio; and a sound-card like interface. Used together, you can easily use a computer to engage in various digital modes, from the venerable Morse code and RTTY to more modern modes like FT8. I'll go into the alphabet soup another time, but the point is, if you don't feel like talking, there's still plenty to do with this hobby, and this equipment.
Antenna system: Wolf River Coil and 102 inch (2.6 meter) collapsible whip
(Wolf River Coils is in Wisconsin! Buy local when you can!).
Without wanting to bog this article down in antenna theory, a quick summary. If all you care about is receiving, antenna length only kind-of matters. The "right" antenna for a given band will give you better results, but you can often pull in some amount of signal, anywhere on the spectrum, with just about any antenna.
When transmitting, though, it matters a lot more. Generally speaking, and understanding there are a lot of exceptions and details I'm glossing over, you want an antenna to be at least one-quarter, if not one-half, the wavelength of the band you're targeting. So, an antenna for 80 meters should be at least 20 meters long!
I don't know about you, but I don't have a back yard that'll support that, either horizontally or vertically (since I wouldn't want it to fall onto a power line!).
So now, let's talk about this antenna system that I'm using. By itself, the 102-inch whip (a little under 2.6-meter) would only be a quarter-wavelength for the 10-meter band, and not very useful on lower frequencies. I could also have gotten a 213-inch whip, which would be a half-wavelength on 10 meters and a quarter wavelength on 20. Lots of people content themselves with that, and it works fine.
But if you want more flexibility, that's where the inductor coil comes in.
A coil—literally a wire wrapped tightly around a cylinder—uses electromagnetic trickery to make the antenna behave as if it were longer than it is. How much "longer" is adjustable with the tuning collar. Leave the collar near the top, and the coil is basically not in use. Instead, you adjust the telescoping whip itself, the same as you would if you had no coil, or for that matter, as we sometimes did back in the "rabbit-ears" days of television.
Slide the coil down, however, and you gain access to successively lower frequencies, that you would otherwise need a significantly longer wire or whip to reach! Used with a reasonable ground plane (provided, in this case, by three long, thin wires that you attach to the antenna's base and then spread out), this particular coil and whip pairing can tune just about the entire amateur radio spectrum.
Tripod: G Gabil GRA-ULT01 MK3 Lightweight Portable Antenna Mast Mount
Wolf River Coils actually sells a complete package that includes a tripod, but they seemed to be out of stock. I may try for one of their tripods eventually, anyway, but for now, the Gabil tripod came highly regarded, and now that I have one, it's not hard to see why.
Fully collapsed, the whole tripod fits easily into a single hand. Unfold it, extend the legs, and you have either a tall or broad base for your antenna. It's designed to take any antenna that mounts to a ⅜x24" base (common in the US), or alternatively to an SO-239 base (common elsewhere). Either way, the feed-point to your radio is SO-239. The Wolf River Coil screws on to the ⅜x24" base, the whip screws on top of the coil. A broader setting of the legs is necessary to support the system if there's any meaningful wind.
Most vertical antennas need a ground plane of some sort, as I alluded to above. Usually this is one or more wires—how many wires, and how long the wires should be, is a subject of much Talmudic debate. The tripod includes four thumbscrews that allow you to attach these radials via ring terminals, or else as an attachment point for alligator clips, or any other system you prefer.
I believe (although I'll admit I haven't investigated all the pieces yet) that it even comes with an adapter that will convert the ⅜x24" mount to a standard camera mount, making this usable as a camera tripod, albeit a comparatively short one!
So, that's the primary equipment I'm using to get on the air. My next articles will talk a bit more about how I've been setting it up, and what I've been doing with it all!